Sunday, December 22, 2013

Chalkboard vs. Chalked Paint

I was talking to someone recently and telling them about my booth at the antique mall and painting furniture and my new found love of Shabby Paints chalked paint. She got a funny look on her face - it's one I've seen before. It's an indication of a very common misconception.  You see, she in envisioning my entire house painted in furniture that looks like this from this post on chalkboard painted furniture.

Is this what you were picturing too?  These are great!  But I wouldn't want all of my furniture painted this way!  There is a big difference between chalkboard paint...and chalk paint.

Chalk paint is a different animal all together.  It is a chalk based paint and it's all the rage in DIY circles for several reasons.  For one, it's just so darn easy to use!  The furniture doesn't need to be primed or sanded before starting. You just...paint!  This appeals not only to my extremely lazy side, but also my impatient streak.  When I want to paint something, and have the beautiful gleaming brand new can of paint...I just can't WAIT to slap that it on!  It drives me crazy to have to do any prep work! 

Another reason people also like it is because it is a more natural alternative to other types of paint.  It has low to no VOC's (volatile organic compound), you know those nasty fumes that can wreak havoc on some people's respiratory systems.  So you can paint indoors, around children, and it won't bother people with asthma or other respiratory problems.  It comes in many gorgeous colors.  And for those who like the shabby distressed look, chalk paint sands off easily sometimes even with just a wet wipe.

Now you may have noticed in some places I referred to it as chalk paint and in some as chalked paint. That's a long story but basically there are many different brands of chalk paint.  Chalk paint itself has been around for a LONG time but one company who makes it actually trademarked the term "chalk paint" and so now all of the other companies have to call it something else.

The brand I LOVE is called Shabby Paints and theirs is called chalked paint so now I've gotten in the habit of calling it that.

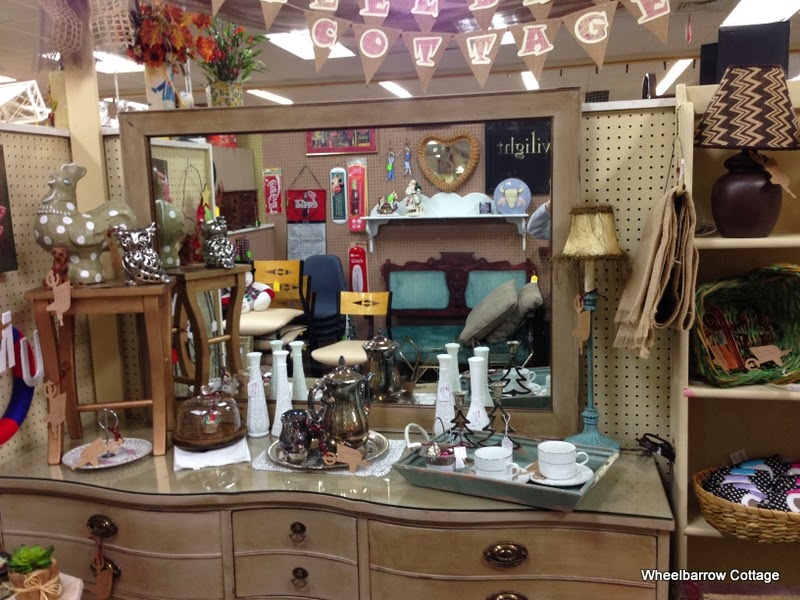
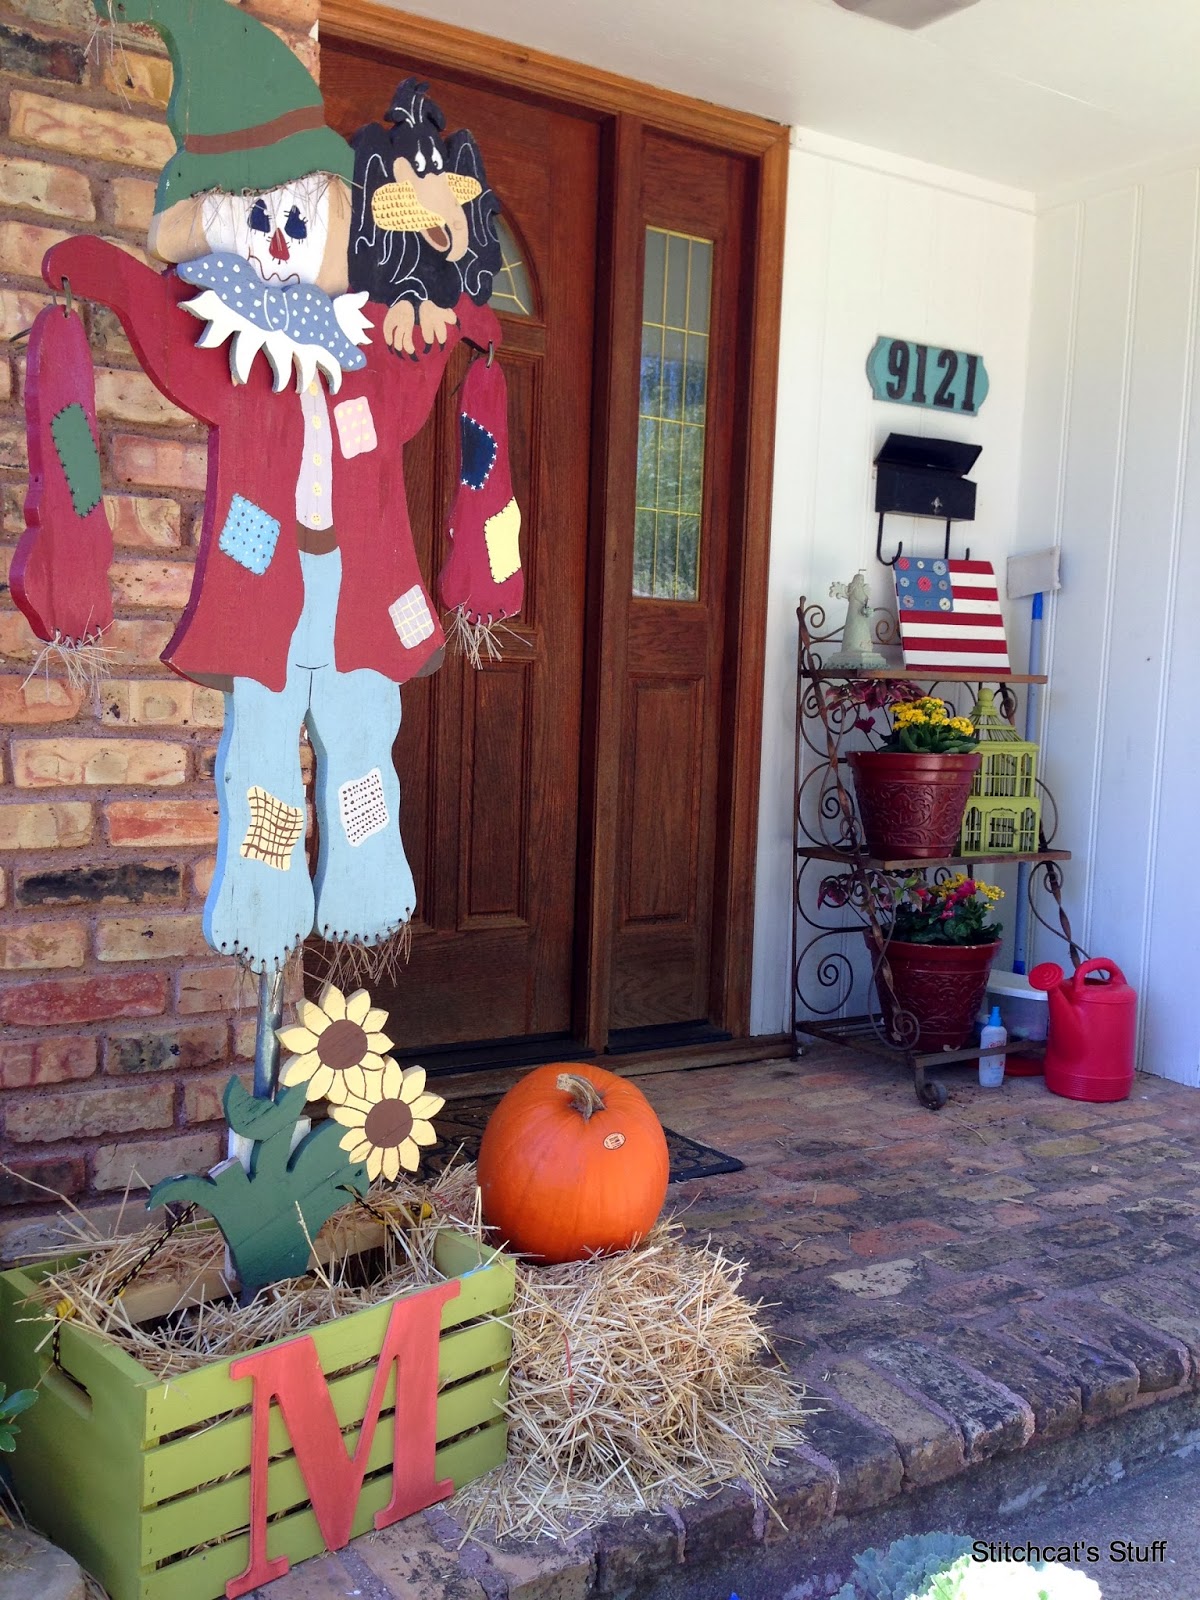
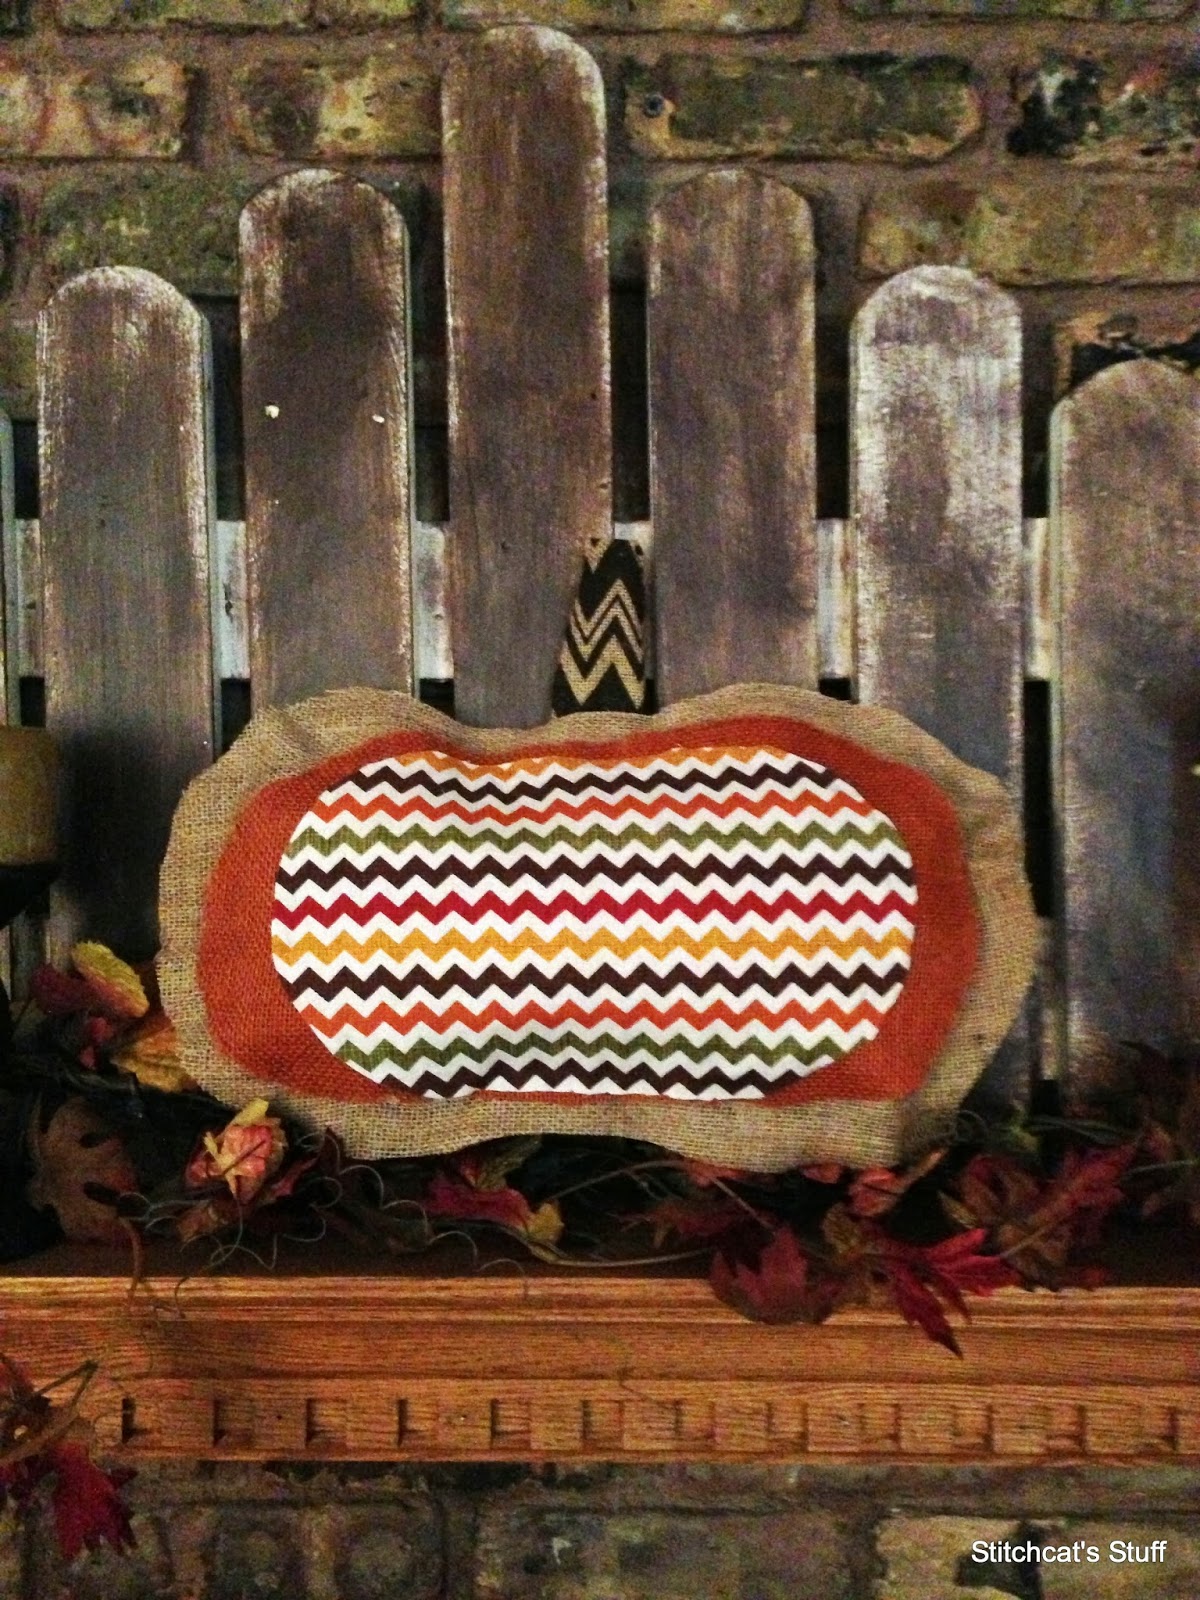
Here are some examples of things I've done with chalk'ish paint of various brands besides the ones I've shown you recently here and here.


 Above is a part of a coffee table I painted and waxed but I never took a picture of the entire thing and at this moment it's covered in Legos and markers and kids' junk!!


I hope this clears up any questions or confusion about chalkboard vs chalked paint! If you have any questions, please let me know!!  And be on the look out for a big announcement from Wheelbarrow Cottage very soon!!  It's going to be an exciting and colorful 2014!

Sunday, December 15, 2013

BUSY....CRAZY!!!!

Anyone else feel busy and crazy?

Last week started with an ice storm that had us at a dead standstill.  But then...we went back to real life and it was zero to sixty.

We had...a piano recital, 3 performances of a musical in which my daughter had a couple of solo parts (which means I was there for every performance), a parent teacher conference, Girl Scout meeting, field trip (an outside one...in the cold AND rain), cookies to son's class for birthday, son's birthday, religious education service project, Junior Catholic Daughter's service project, Christmas shopping, and a doctor's appointment. 

In the midst of all that...I sold a dresser at the antique mall!!  Luckily, my mom and partner, was able to take some little things out there to replenish.  It went from this

 to this

Still looks cute but I think it's lacking the one big anchor piece.  I'm working on it...in the middle of 5 million other things.  Can't wait to show off the piece I'm doing right now.  Can't wait to have time to finish it!!

In the mean time, let me finish showing you the rest of what I worked on during the ice storm.  I blogged about the rooster and the owl here.

Do you have an old frame that looks worn and tired?  Or the color is out of date?  Frames are super easy pieces to refinish.  Just a little #Shabby Paint chalked paint and a quick finish of Varnish to protect it and you've got a brand new piece.

I also worked on a frame that turned out GORGEOUS!  I bought it at an estate sale and at first it looked like this...


It was not horrible looking but so much better with Shabby Paints Peacock blue, Old Gold glaze and Varnish.


Maybe you have a little table or dresser that is in great shape but a tad boring?  Next up is an adorable little side table/dresser that fits this description perfectly.  My mom bought it for my grandfather's room at the nursing home where he was living this time last year.  He passed away in January.  I drive by the nursing home many times a week when I go to Jazzercise and still get a pain in my heart when I see it.

Anyway, I got too excited about refinishing this piece and did not take before pictures - the more you follow me and my blog the more you'll realize I'm a huge airhead and am constantly forgetting to take before pictures!

But, the brown that you see is the before color - just slightly boring-ish.  The more you follow me and my blog the more you'll realize that I make up my own English language. 

I painted the front of the drawers and the sides in Shabby Paint Worn White and then gave it a distressed looking finish of Hazelnut #ReVax.  I love how it turned out!


So that ends the tour of stuff I finished during the ice storm! I got a lot done!

But most special during that time was the family together-ness (see, my own language again).  We watched movies, went sledding (well, not me - haha), baked and ate together.  It was wonderful to have some forced downtime.  Makes us remember to sometimes CHOOSE to take that downtime together every once in a while!

In the meantime, take a look around your house and see what pieces you have that might need a spruce up.  It can be an easy way to make some changes in your home #decor.

Tuesday, December 10, 2013

Ice Storm Blues

It's been COLD and ICY here in Dallas the past few days!  This is our first day back to real life since last Thursday!  We actually had a great time. Luckily, our electricity didn't go out like many people we know.  The kids watched a LOT of tv and went sledding several times.  I baked and we all ate bad for you stuff.  We kept a fire blazing in the fireplace.  And I did TONS of painting!!!  I'll be sharing some projects with you!

See the rooster and owl above?  They've been in my booth since day one.  They're cute - but I knew they could be awesome!

Even if you don't have a booth, painting is a great way to spruce up decorations you've had around the house before holiday entertaining starts up.  It can also help with holiday gifts.  Both of the items I'm highlighting here were bought at thrift stores for a dollar or so.  A little paint makes them both gift worthy...in fact, someone I know MAY be getting one of them - but I won't say who and give it away!

I used Shabby Paints Peacock Chalked Paint which is a pretty bright blue - kind of turqoise'ish.


The rooster has lots of grooves so I finished him off with black ReVax and it turned out gorgeous!


The owl got pearl ReVax!  Might be hard to see well in the picture but it looks gorgeous in person.


Vax is Shabby Paint's amazing furniture finish that gives the protection of varnish and the look of wax.  Put away your buffing cloths and sore arms - all you do is paint them on!  No rubbing, buffing, or sweating while you finish up those projects!  It's amazing!  ReVax is Vax in colors - pearl, black and hazelnut (dark brown).  They are beautiful!

I also did a frame with a glaze and a small dresser in Worn White with hazelnut ReVax. Stay tuned to see how those turned out!!

Stay warm!


Sunday, December 1, 2013

Project Frustration!!

Have you ever done a project where EVERY SINGLE THING goes wrong??  I had hoped to post a picture of this chair / bar stool that I'm refinishing...


But SERIOUSLY...EVERY. SINGLE. THING. has gone wrong!!!  UGHH!!!  Ran out of paint, got a glob of a different color on part of the chair that had the paint I had already run out of, messed up the graphic I was trying to put on the seat.  

I think it's time to put it aside for a while and get back to it another time before I throw it through a window!!

Ever have those projects?  What do you do?  Take time off?  Fight through it?  Have a glass of wine (which is what I'm doing right now)?


Wednesday, November 27, 2013

Cupcake Liner Christmas Tree


This craft was so fun to make!  I had a canvass that I painted green and then covered it with red sparkle paint.  I had some festive cupcake liners which I folded into fourths and then hot glued them to the canvass in a Christmas tree shape!

I used burlap and a ribbon for the tree stump.

I made this for the fall bazaar I was a part of about a month ago.  Tons of people stopped and ooooh'd and awww'd over it...but no one bit.  It's in my booth now. 

Now I'm on the hunt for more cute cupcake liners to make more of these cute signs in different shapes - maybe a snowman or a snowflake!

Tuesday, November 26, 2013

Painted Fall Frame

Just in time for fall stuff to stop selling and Christmas stuff to start...I made a beautiful fall frame!  I know, I'm always a step behind.  Oh well!

I've had this one for a LONG time! I got it super discounted at Hobby Lobby forever ago. It had this lovely picture in it.


Hahaha!!  Hello Mr. Fish.  Looks like your luck ran out!!

 I tricked the kids and showed it to them when it was still in the frame and told them it was going over the couch.  They were like WHAT???

Here is a picture of just the frame.


And a close up.


Nice details but I knew it would be so much better painted!

I started out with a coat of CeCe Caldwell Texas Prarie - kind of a light green color.


Don't you love my painting table cloth?  It used to clearly be a Christmas one and now it is just all kinds of random colors.

Next I covered it with CeCe Caldwell's Mesa Sunset.  I distressed with a wet wipe and then gave it a coat of CeCe Caldwell's Satin Finish.  I didn't get a picture of these two steps.

Last, I covered it in Shabby Paints Hazelnut ReVax to make it look aged.  I LOVE this stuff if I haven't said it a million other times.  It's a varnish and a wax - without the hard work of wax!!  I could have used dark wax and a it would have taken a lot of muscle work and time.  But instead I just painted it on and was done!  Easy Peasy!  Oh, and gorgeous if I do say so myself!  Barbecue I've found if you don't compliment yourself, sometimes you don't get compliments!  Haha!  Unless you hint around for them like I'm doing now and then you're never really sure if they're real or not.  Oh well - I take them how I can get them!


And it's now in my booth - #0622 Wheelbarrow Cottage in the Antique Mall of Mesquite - 3330 N. Galloway, Mesquite, TX 75150 - open 10-6 M-Sat and 12-6 on Sunday!


Sunday, November 24, 2013

Fall / Christmas Pallet Signs

A while back ago I posted about some wood pallet signs I made from wood shims for Easter, Spring, 4th of July, etc. They are easy and cute! I made several to sell in my booth for the holidays.

I made this one for fall.  It is made from felt circles and fabric stuffed with plastic grocery bags to give it a little dimension!  I love the chevron fabric!


This one I had painted red and white last summer to use for 4th of July but never got around to doing anything with it.  I had some green vinyl so...voila!! A Christmas sign was born!


I love how this one turned out.  I printed the graphic onto burlap and mod podged it onto the wood. 


I had made one of these for a fall bazaar I was a part of at my Jazzercise center.  I have seen tons of Keep Calm and Jazzercise On things but I always thought that was backwards.  I Jazzercise so I CAN keep calm!  So I turned it around.  I had made one in green and pink for the bazaar but another center owner was there and wanted one in black and white for her center. 


I have so much fun making these!!  I'm already looking forward to making some Valentine's ones!!  Red felt hearts?  Or pink felt lips?  Hmmm....

Friday, November 22, 2013

New Computer and New Name

Wow!  A few weeks ago our laptop just DIED!  It wouldn't turn on.  And of course it happened RIGHT while I was trying to get a bunch of stuff done for a fall bazaar where I was selling a bunch of crafty things.  I needed my computer for to operate the Silhouette Cameo for some signs I was making as well as some graphics I needed to add to some furniture.  STRESS!!  I got though it though.

We finally just got a new one that came Wednesday.  I am having a hard time getting used to it though.  Ugghhh!! It is a lot different from out other one - I can't seem to type on it as well and it has Windows 8 which is very different.  Change - no fun!

One change in my life is fun though - the booth I opened at an antique mall!!  My mom and I decided to go in on it together.  It was kinda scary but it's been a lot of fun.  I just picked up our first check and we already made rent in the first two weeks!  I haven't sold any furniture yet - boo - but everyone tells me to give it time!

I'm calling my little business Wheelbarrow Cottage.  There is a story behind the name which I'll share one day.  I decided my blog should have the same name.  I have a Facebook Page too - just look it up by Wheelbarrow Cottage. 

Here are some pictures of it!  I'm so proud and having tons of fun making and painting things for it as well as hitting thrift stores and estate sales to find things to sell!


Saturday, October 12, 2013

Fall Porch - Shabby Paints Review

FINALLY!!!  Fall is HERE!!  Well, the weather doesn't feel too fallish today, but it's Texas so we take what we can get.  It's supposed to feel like fall next week...and it did for a bit last week...so yay!

And FINALLY!!!  I finished my fall porch.  It took me a while.

I got a crate from JoAnn's forEVAH ago!  I spray painted it a beautiful green.  I knew I wanted it for my porch but wasn't sure what I'd do with it.  Then when I was dragging stuff out to decorate, I found Mr. Scarecrow!  He used to get attached to a big tree at the side of our house but we cut the tree down last spring.  He was just begging to be put in the crate on the porch!  It's perfect!


I had been dying to try a new line of chalk paints called Shabby Paint.  The draw for me is actually their product called Vax and ReVax.  It is a varnish that gives the look of wax.  You get the same effect of wax and/or dark wax without all of the elbow work.  You basically paint it on.  So I ordered some paint to do some shelves in my kitchen.  The color I got is Coral Paradise but for some reason online I thought it was more orange "ish" than it turned out but it is still a GORGEOUS color.  And as soon as I saw it, I knew it would be beautiful with the green on the crate.  So I got an "M" and painted the coral paint.  I LOVED this paint.  It is so thick and goes on really smoothly.  I actually did use the ReVax (the Vax with color - in my case hazelnut) on the "M" but you can't really tell in the picture.  I'm going to use it on a chair I'm painting so I'll do an actual review of that product another time.  This is more about the paint.

Here is the crate and the "M"!!


I would like to use this paint again - it was really easy.  Oh, I can't believe I left out the best part.  The prices!  This paint is relatively inexpensive for chalk paint.  And, they have tons of different sizes which is so refreshing from the standard quart and sample size.  But...here's the rub.  Right now they don't have a lot of retailers selling it - the closest to me is in Oklahoma - which is not exactly close.  You have to order it online and by the time I paid the shipping fees, it was the same as the CeCe's I love and that I can run out and pick up with no shipping fees.  Uggghhh - nothing can ever be easy!!  Oh how I wish I had a place to sell paints!!

Okay, back to my porch!  I put the crate, the "M" and Mr. Scarecrow all together...added in some hay and a pumpkin and VOILA!!!  Fall porch!!


I'm working on making a new more fall-ish pallet sign. Oh, and did you see my cute birdcage?  My mom was leaving church one morning and saw it and a perfectly good chair on the side of the road for bulk trash.  She stopped (yes, in her mass clothes) and loaded them up for me!  What a great mom!!  A little green spray paint - I am in LOVE with this green color - and it makes a cute addition to my plant stand.  The green I'm using is Valspar Color Radiance Spray Paint in Pesto from Lowes.

Here's the whole thing with some new big pots of flowers!

And of course no porch is complete without a remote control 4 wheeler!!  LOL!

Hope you're having fun with your fall porch!

Monday, September 16, 2013

Cute Babies for Monday

Happy Monday morning!!  I'll have a fun craft to share this week but it's not ready quite yet.  So, here's some cuteness for your Monday morning.  My kids and I must have watched this 100 times this weekend!!


Thursday, September 12, 2013

Burlap and Chevron Pumpkin Tutorial

Fall is my favorite season/time of year!  We don't technically get much typical fall weather in Texas - we have flashes of it though!  But, enjoy the beautiful colors, tastes, decorations and activities of fall!  I always make taco soup on the first football Sunday so I did that this past weekend...even though I had the one bad thing about fall - my first fall cold/allergy crud - boo!!

I'm also busy decorating for fall.  I made a super fun fall craft while lying around sick last weekend.


This cute pumpkin is made from three different burlap - regular, orange and a chevron burlap for the stem.  And then some cute chevron fabric in fall colors.  I got the fabric and burlap from this Etsy store - Dorothy Prudie Fabric. She has the cutest stuff!

I cut all of the fabric into a pumpkin shape.  I just got a clip art pumpkin, printed it and then blew it up with my tracing projector and traced 3 sizes on the wall.

I cut two pieces of the regular burlap which was the biggest size.  I only needed one of the orange middle sized pumpkin and one of the smallest fabric pumpkin.  Then I put Mod Podge all over the burlap pieces.  It made them stiff and I read it should help the edges not to fray.

Once it was all dried, I hot glued fabric onto the orange piece, the orange piece onto the regular burlap and then the two regular burlap pieces together but I left a gap in the middle.  Once the hot glue dried, I stuffed it with plastic grocery bags until it was all full and fluffed up like a pillow.  For the stem I just rolled up a piece of burlap with brown chevron print, hot glued it together and then hot glued it into the opening and sealed it all up!


It's supposed to be a front door decoration but I LOVE IT so much, I don't know if I can bring myself to put it outside and risk anything happening to it.  I think I might make it a mantel decoration!


I need to hang it up on the fence posts but I was just too excited to share to wait until I had time to do that!!  I love it and it was super easy!