Monday, August 20, 2012

Grub It Down Wood Sign


I LOVE wood signs and wood projects.  I am always drawn to any pictures of them I can find.  I have a wood crafts board on Pinterest to help spark ideas.

At the beginning of the summer I started painting my dining room from the tannish color that was on the walls when we moved in to a light yellow.  It's so fresh and fun!  I LOVE the change!  I've wanted to have a kind of rustic looking wood sign in my dining room and now with my new dining room - it was the perfect time to work on it.

I thought long and hard about what I wanted it to say and one day it came to me - the perfect thing for OUR family was this...

Grub it down is phrase that my husband has used ever since I first met him 16 years ago!  If I would say, "I'm hungry" he might say, "Grub it down!"  So lately our kids have picked it up.  It's so cute to hear them say Grub It Down!  So I knew that had to be our sign.  I love that it is so personal to us.

So hubby got some wood, cut it down and nailed it together for me.  Isn't he sweet?  We're such a good team that way!  Then I used my Silhouette Cameo to cut stencils out of contact paper and painted away!!  When I finished painting I sanded over it a little bit to make it look more distressed and then sprayed a clear Mod Podge Clear Acrylic Sealer.

It looks so cute in our dining room.  Here are a couple of views of it.


Sorry for the hanging light in the middle of the picture but there is no way to get a wide view of the sign without it there!


We love looking up at our Grub It Down Sign when we sit down to eat family dinner! 

Linking to the parties on the sidebar and:

Made By You Monday
Motivate Me Monday 
Terrific Tuesday

Thursday, August 16, 2012

Towel Hooks and Chore Charts: Organization with Cameo

The Silhouette blog wants to see examples of ways we use our Silhouette Cameo to help organize our lives. I instantly knew of two projects I've done recently that utilized my Cameo to get more organized.  It's so hard to pick one!  So I decided to share both! Don't worry - they're short, sweet and simple!

My mother-in-law has a little booth in a gift shop in the town where she lives. Her booth does really well but every once in a while she has certain items that won't sell for some reason. Sometimes she gives them to me so that I can do something with them like these towel hangers.

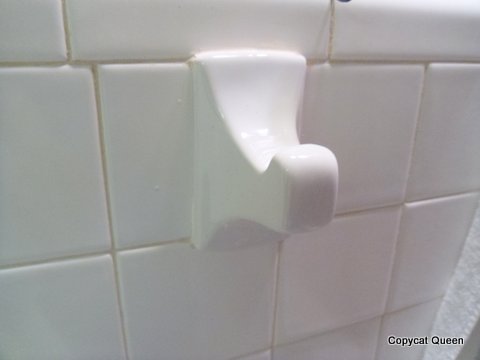
I had no idea what to do with them when she gave them to me so they sat in a closet for a while. Recently, my kids were given some adorable personalized towels. Up to that point we had been using the ONE towel hook that we had in our bathroom and had been successfully using with the 3 little baby towels that they were STILL using! It became quickly obvious that the one hook wasn't sufficient! I immediately knew I could use the "His" towel hooks!

So I taped off the hook part and spray painted the rest white. I got out my Cameo and cut their initials out in "their" colors in vinyl. My kids are color coded by the way. One likes green, one likes pink (or in this case I had purple - close enough and acceptable to her!), and one likes blue. It has turned out that I can usually find one of each color in whatever "thing" I'm buying and it helps to keep everything separate. I slapped the vinyl on and hung the towel hangers up! Easy Peasy!


Instead of everything on this...


They're on these...


WOW - I really need to change that light cover!!  Amazing what you notice when you take pictures for your blog!

Next up...chore charts!  I found these magnetic boards at Tuesday Morning in the clearance section.  I wasn't crazy about the bamboo look but I knew I could use them for the kids rooms somehow and I also knew I could do something about that bamboo look!  I forget how much they were but they were super cheap and a good deal off of what they originally were so I grabbed them up!


For a while I've been using some laminated pre-printed chore charts that worked well but I just wasn't crazy about them. The kids had gotten kind of bored of our system and weren't doing their chores as much. Plus with school coming up, I knew I had to get organized about the morning rush as well as get them excited about doing their morning routine so we can get out the door quickly. So I knew these boards would be perfect!

So, I got out my Mod Podge...


and slapped some scrapbook paper on - color coded of course!

Next, I used my Cameo to cut out some 3x4 life library pocket.  Then some labels - sorry, I couldn't find a link to the ones I used.  I cut the labels out of chalkboard vinyl.  I put each one on a library pocket and then used the magnets that came with the magnet boards to hang them.  I had ordered a chalkboard marker and used that to write each chore down.  Last I just painted some popsicle sticks white and then hot glued some ribbon around the edge of each board.  So, each time the kids complete a chore, they put a popsicle stick in the appropriate pocket.  At the end of each day, I mark down that they have done all their chores.  I have another little dry erase board for the daily tally.  At the end of the week, if they have 7 tally marks, they get their allowance.

They turned out really cute.  The kids love using them.  And with the chalkboard vinyl, I can change chores as they grow or if we find something that is a new priority for them to work on!  Most of the chores listed are things they do in the morning and must have done before we leave for school.  This is important especially at the beginning of the school year.  As the year progresses, we may need to work more on getting homework done or cleaning up before bed so we can change the chores to one of these more pressing issues.

I hope these have given you some organization inspiration.  My Cameo just makes everything I do cuter, faster and way more fun.  Now if it could just clean out my closet for me!!!

Linking up to blogs listed in the sidebar as well as:

Making the World Cuter

Silhouette Blog

Saturday, July 28, 2012

ADD Day

I have SO many crafts and projects that I really WANT to do - I do!!!  But I am SOOOOOOOOOOOOOO ADD today.  I can't concentrate at all.  Uggghhhh!!!

What do you do to stay on track?

Thursday, July 26, 2012

Mailing Tube Vase Fillers


I did some work on my mantel and I wanted to share a neat trick I used to fill vases - and tell you the mistake that I made that I can't fix now but hope that no one really notices. I had these two HUGE vases that I wanted to fill with beans/peas and a candle but...I didn't want to buy TONS of beans and peas.


I remember seeing somewhere - thought it was Pinterest but couldn't find it again - where someone used paper towel roles in the middle of their vase to help fill up the space. I did have some paper towel roles but they were still going to be too narrow.  So then I remembered that I had kept some of the mailing tubes that I get when I order vinyl from Expressions Vinyl - the ONLY place I get my vinyl if I can help it!!  It was in my stack of stuff I save because I know I'll need it at some point but have no clue what that might be at the time.  Do you have a stack like that?  It drives me (and my husband) crazy most of the time because it just looks like junk but then that magical day comes when you you think of something to do with it!!  Well, that magical day came for me! 


I dug out my container and cut it in half.  But...do you see below where I went wrong?  I see it now, but didn't then.  Notice the difference in the heights of the tubes!  Uh oh! I'll point that out more specifically in a minute.


What is cool is that each end has a cap so I didn't have to stuff anything down in the middle to keep the beans from going down in there.

Add caption

I filled each one with the white beans first and then the split peas.  I was oh so careful to get it all equal...but remember the difference in the tubes?  One is higher than the other. Didn't realize it until all the beans where in.  Now there is no way to fix it without having to pour out the beans which would mean separating all of the beans.  Um, no, thanks.  I'll wait until I refill it this fall and then cut the container to the right size.

In the overall scheme of things I don't think anyone would notice.  I don't think people are in the habit of staring at my mantel the way I was doing when I was just looking over the craft I had done.  All in all, I'm really happy with the way it looks!!  (Oh, I've since taken the red lantern off - it didn't look right.  But I'm too lazy to go take a new picture right now - haha).

Mailing container as vase filler
Mantel with vases and vase fillers

I just love these vases and can't wait for fall and Christmas to change them up again!!

Wednesday, July 11, 2012

Importance of a Good Pictures of Your Child - Safety Issue

Our police department posted a really interesting article on Facebook yesterday from the National Center for Missing and Exploited Children.  It is called The Importance Of Having A Good Photo Of Your Child.
One of the most important tools for law enforcement to use in the case of a missing child is an up-to-date, good-quality photograph.
  • The photograph should be a recent, head-and-shoulders color photograph of the child in which the face is clearly seen. It should be of "school-portrait" quality, and the background should be plain or solid so it does not distract from the subject. 
  • When possible the photograph should be in a digitized form, and available on a compact disk (CD), as opposed to just a hard copy. This minimizes the time necessary to scan, resize, and make color corrects before disseminating it to law enforcement.
There are many more tips - go read them here.  These are things I NEVER would have thought to have on hand. I mean, really, who sits around thinking about this stuff. But, if it were necessary, I can see how it would make all the difference in the world in a terrible situation.

My goal today is to check and see what I have on hand. I think the most recent would be their school pictures. It says to redo them every six months so I should probably update them. I guess it depends on how different they look from their school pictures.

I hope you do the same!

Tuesday, July 10, 2012

Camp T-Shirt and Address Trading Cards

I wanted to show off how cute Big Bear is in her camp shirt that I talked about in this post!!  I am going to miss her so much!


I never went to camp as a kid but I can just imagine one of the most fun parts of camp is meeting other kids from all over the place.  I had high hopes for Big Bear to write to friends and keep in touch.  Last year, my mom made Big Bear the cutest little laminated cards with her name, address and picture that she could pass out to new friends so that they could write to her. However, no one did until just a few days ago!  We couldn't believe it when out of no where this letter came after a whole year!  The little girl must have been gearing up for camp herself.  In fact, she might have ended up being there this week too - a few weeks later than Big Bear went last year.  On the flip side, Big Bear didn't get anyone's addresses last year - she just passed out her own.  She also never wrote to me but that's another topic for another post!!  Haha!

So, in typical me fashion, I came up with an idea at THE LAST MINUTE. Why can't I ever have creative ideas IN PLENTY OF TIME??? I thought of a way, using my Cameo, to be able to both pass out her address and collect them at the same time. Here's what I did...

Going into the Silhouette Studio Software, I made a rounded rectangle and then made a mirror image of it.


Then I welded it the two shapes together.

Next, I added a line in the middle of the two shapes and went to the Cut Style page.  I turned that line into perforated.


Next I added my text.  I set the page to have registration marks and from there I printed them out as a Print and Cut project and cardstock.

Here's what I ended up with.  They turned out so cute.


One side has our address while the other side has room for the friend to fill in their address information. Since they are perforated, they can tear them apart and trade. In fact, when I showed Big Bear, she said, "Oh, like trading cards".


I hope she actually uses them and gets some addresses!  It will be so fun for her to be able to write some letters and keep in touch with some friends who she'll see next year.

Saturday, July 7, 2012

Camp TShirts With T-Shirt Vinyl

Camp time!!  Big Bear is headed to camp soon!  She loves it.  It's a week long and she doesn't even miss home or her parents one bit.  I am blown away by this because there is NO WAY my parents could have dropped me off at a camp for a week by myself when I was a kid.  They were lucky they got me out the door to college!  She is very different from me as a child.

This year she has two friends going with her.  I decided to make them some cute matching shirts to wear.  So I placed an order with Expressions Vinyl.  They get their stuff out SO fast!  I had my order within a couple of days, broke out the Cameo and got to cutting!

The camp they go to is a Catholic one and and the theme this year is Under My Roof.  This is a phrase that comes from one of the new translations of the mass that was introduced earlier in the year. I tried to replicate their logo as best I could with the roof top and cross.  I cut that out in regular green t-shirt vinyl.  Then I found a campfire in the Silhouette store.  I cut one of the fire pieces out of fabric using the clean cut transfer paper from Silhouette.  I cut the other one out of regular red t-shirt vinyl.  The log was cut out of brown t-shirt vinyl.


Next I used some of the SUPER fun glitter t-shirt vinyl to make their names!  This is where I did something wrong - the C & the E in this one ended up meshed together.  I think I must have smushed them together during ironing.  Oh well, it won't be that noticeable when she's wearing it.  Isn't it pretty though?  I can't wait to make tons more fun stuff with the glitter vinyl.  I see baby gifts, Christmas gifts and much more in my future!!


I love the way these shirts came out.  I hope the girls have so much fun at camp!!


Friday, July 6, 2012

4th of July Wreath


Last 4th of July post - PROMISE!!  I wanted to share the wreath that I made.  It got the inspiration from this Pinterest wreath:


I started out with a pool noodle. I taped it up into a wreath form. Then I wrapped it with some fabric. I hot glued some red and white baker's twine and broke out the Cameo to make the banner. It turned out a little smaller than I originally wanted but still really cute I think.

Next I had my little crafty helper, Me Too, give me a hand with the rest. We made some little flags out of popsicle sticks. We painted the sticks and glued them all together.


I hot glued them onto the wreath and hung it on the door. I really like how it turned out!


Thursday, July 5, 2012

4th of July Mantel

We had a super fun 4th of July.  It started with a parade that our neighborhood has every year.  We were reminiscing about how when Big Bear was a baby we'd go to that parade and it would be about 10 minutes long - a few cars, some drill teamer's and cheerleaders and that's about it.  This year it was close to an hour!  So many cars and floats - tons of candy and lots of fun.  Kind of neat to watch it grow each year.  After the parade, we came home so that I could run some errands to get Big Bear ready for camp.  I wanted to take advantage of having my hubby home on a weekday and even more advantage of the stores being open on a holiday which turned out to mean that there were hardly any other people there!  I got a lot done.  But I didn't want the whole day to be about work so after lunch we headed to my parent's house and spent the rest of the afternoon in the pool.  After grilling out, we all took showers, vegged out for a little while and then headed out for fireworks.  It was a LONG day but SO FUN!!  Hope yours was great too!

I did a lot of 4th of July crafting.  I'm not usually that big into 4th of July decorating.  It usually sneaks up on me and then I don't really want to bother with decorating for just a few days.  Well, it snuck up on me again this year, but I did bother!!  I already showed you my entry hall decorations in this post.  But I did even more!!

It really has to do with the fact that I'm keeping a little girl two days a week for a few weeks this summer.  I've had to get a little creative in order to keep all 4 kids occupied.  She really likes to do crafts so I've been trying to plan crafts for us to do and that led to a few of the fun things I ended up using for decorations.  Of course, these come from ...where else, Pinterest!!  Check out my 4th of July board to see where I got the inspirations for all of these cute crafts plus the wreath I made!!

So these are the first ones we made.  Little paper lanterns.  The Pinterest version were WAY cuter but we had a lot of fun making these. It was a last minute idea that ended up looking really cute on the mantel.


Next we made these cute little lanterns.  We took empty jars and mod podged tissue and crepe paper on the inside of them.  The kids were all working on this craft and I got jealous because there wasn't another jar for me.  I went searching around to see what I could find and ran across this wine bottle I had started to spray paint forever ago for another craft I didn't finish and I made one too!!


 I had a wooden picture frame so I painted it blue with red dots.


Then I took a canvass and painted it red.  I cut a star out of paper on my Cameo and used it for a stencil. I used glitter paint but then also poured some glitter on top. I think it turned out so fun!


All in all, the mantel turned out so cute!!  When the sun started to go down we turned on little flame less candles that you get at the dollar store that I had put down in the lanterns.  It looked so pretty!


Sunday, July 1, 2012

4th of July Crafts

The 4th of July is one of my favorite holidays of the year! We always attend our neighborhood parade and then there is a big carnival at the recreation center where it ends. There is ALWAYS swimming at my parents house and usually cooking out - or eating out. Either way, I don't cook. That is what happens during the years that the family is in town. My husband takes a week long vacation every July with his brother for a hobby that they are both involved in. Sometimes that vacation takes place during 4th of July and then it's never as fun - but this year he's home for the holiday.

I've tried to make the house a little festive. Hard to do in the midst of repainting the dining room. It's SUCH a mess. I'm a slow and messy painter. It takes me forever to finish the job. In this case, it will be SOOOOOOOOOO worth it. It's looking pretty and I can't wait to share!

A while back ago, my mother in law gave me some wood blocks that she could not sell in her shop.  I Mod Podged scrapbook paper onto two of the sides and cut "Happy 4th" in some vinyl with my Silhouette. It turned out so cute. And then I got a beautiful new glass vase for my birthday and immediately knew what I wanted to do with it. I had seen this on Pinterest:

Source: makoodle.com via Stevie on Pinterest


And knew I wanted to do something like it with the beans.  So...I did!!  I found a printable to go with it as well.  Here's how it turned out!  It's in my entry hall on the little piece of furniture that I painted a while back with  my own version of chalk paint.  Stay tuned...I got some Annie Sloan chalk paint and wax for my birthday so I can redo a buffet piece in my dining room!!  I can't wait to get started on it.


I have one more 4th of July post coming - a wreath for my door that Me Too (my fellow crafter and 6 year old daughter) helped me create! 

Hope that 4th of July is inspiring some creativity in you as well!!  Please share!

Friday, June 29, 2012

Camp T-Shirts and Glitter Tshirt Vinyl

I know, I know...I have been MIA for a while.  Life got CA-RA-ZYYYYYYY!!!!!  I will share pictures of why very soon!

But...I'm back in bizness!!  Crafting away!  In fact, I'm super excited because I just ordered a bunch of fun Tshirt vinyl from my fav vinyl source - Expressions Vinyl.  My daughter will be going to camp in a few weeks with a couple of her friends.  I'm making them all matching t-shirts to wear one of the days that they are there.  I can't wait to show it to you!!  They just added a new GLITTER tshirt vinyl!!  It's going to be soooooooooooooo purty!!

I'm also working on redecorting my dining room.  It's a mess right now since I'm in the middle of painting!  Ugghhh - me no likey painting.

Oh...I got some BEAUTIFUL new milk glass for my birthday last week.  And a gorgeous glass vase from my hubby. 

I can't wait to show all of this fun stuff to you!  Check back to see it soon!

Thursday, May 24, 2012

School is out!!!

My school is out.  My two oldest kids are still in so me and my little buddy are hanging out.  I'm starting to recover from the craziness that is the end of school and so crafting is about to resume.  Hopefully, blogging will follow!! 

I'm working on some 4th of July stuff, teacher gifts, and a big wood sign for my dining room.  Hopefully I can finish these up and share them soon!!

Thursday, May 10, 2012

Complaining Post

Gonna complain a little bit...sorry.  But it's been a bad bad week or so. 

I hurt my foot last Wednesday while doing Jazzercise.  I felt a searing pain through my ankle and then in my heel. I didn't have to stop my class but as the day went on it hurt worse and worse.  It woke me up all that night because it hurt so bad.  The next day I didn't know what to do about work.  I move from classroom to classroom, go up and down stairs, and am on my feet most of the time I am in each classroom. I was determined that I would NOT call in sick because my foot hurt!  That seemed awfully silly.  But by the time I walked across the parking lot and got into the building I was in tears.  I knew I wouldn't make it.  So I gave the teachers the lesson I was going to do with the kids and went home to rest my foot.  Friday I went to the doctor and he said some of the fibers in the ligament in my foot had torn.  He wrapped my foot, gave me a prescription for Naproxen and sent me home to rest my foot and ice it.  The tape helps a lot.  I was actually supposed to take it off yesterday but I was scared it would hurt at work this morning so I left it on.  Then I was going to take it off after work...but I've been home an hour and a half and it's still on!  I have to go back to pick up my son and then I found out I'm getting some sort of award at the PTA meeting at my older kids school tonight and I don't want to limp up there so I think I'll leave the tape on tonight.  I go back to the doctor tomorrow - we'll see what he says!

And if constant foot pain isn't enough, yesterday my husband and I BOTH had some sort of weird stomach virus.  I spent almost 24 hours feeling like I was going to...you know...get sick - I never actually did but just constantly felt like I was on the verge.  Torture.  Plus, it's really hard when both mom AND dad are sick.  The kids didn't mind getting to watch videos all afternoon and having Happy Meals for dinner though.

I'm trying to recover today but I still feel pretty yucky. 

Sorry to complain.  I do have some good stuff to share about my daughter's First Communion that she celebrated last Saturday.  I made her a cute shirt for the after party with my Silhouette Cameo that I need to share.  I'll get some pics of it and get that put up soon!!

Hope your week is going better than mine!

Sunday, May 6, 2012

Popcorn and Candy Party

I teased you the other day with this post and then I disappeared! Sorry about that. To say it's been insanely crazy busy around here is the understatement of the year!  I will try to do better.  Although...I have to say, there are not a WHOLE lot of projects being done around here lately with end of the year school stuff going on.   But I do want to share something I put a lot of time into last month that turned out so cute.  I was extremely proud.

I found this on a blog one day and instantly fell in love.  I knew I wanted to do something similar as a decoration for my daughter's first communion party.


The tutorial said that I should be able to find at any home improvement store.  I also found this...

which also said that she got the boards at Home Depot.  Guess what I couldn't find...anywhere??  Not at Home Depot, Lowes, a local lumber store - no where.  I was SO frustrated and disappointed.  But then I thought about this bench that has been sitting on my front porch for many many years.

Bench that needs to be re-done
Old bench that I've been meaning to fix up

It has definitely seen better MUCH better days!  I have been wanting to fix it up and repaint it but then I decided it had a new purpose in life!  So I got to work...taking it all apart, sanding and putting it back together in it's new form.

Here I am using a power sander!!

Me using a power tool!

and here is is after I nailed it all together.  But...I got it a little crooked so hubby had to re-do it for me.

Spacing a little off
My first attempt at a little fence - spacing a little off

Then I painted it yellow and VOILA!  I think it turned out so cute!  Here it is decorated for a party that I'll tell you about in a minute.
Finished product - little fence with fabric flowers

The no sew fabric flowers were SUPER easy to make. Here's a link to the tutorial.

I did end up using the flowers and fence for my daughter's first Communion party (which I'll post about soon), but another event came up a few weeks ago that was perfect for this cute little fence and flowers.  I had the opportunity to decorate the teacher's lounge in my kids' school for a popcorn and candy party for teacher appreciation week.  I had more fun with this than anything I've done in a while.  I shopped around for apothecary jars, pretty bowls, and made fun decorations with my Silhouette Cameo.  Here are some pics of the teacher's lounge all decorated for the party.

Candy and popcorn party - fabric flowers, big lollipops.

I used this Pinterest find for the giant lollipops and the hard candy on the wall.

Source: parents.com via Stevie on Pinterest


The candy table...

Popcorn and candy party
I ordered the cute candy cups and two of the cute little apothecary jars from TomKat Studios Party Shop.  They have ADORABLE stuff - very affordable and they shipped to me lightening fast.

Popcorn table...

Popcorn and candy party


I made these little banners with my Cameo - the one over the popcorn says salty and the one on the fence on the candy table says sweet.

"Salty" banner
I also had a fun candy bar game.  I passed out clues to the teachers.  For example - Famous swashbuckling trio of old.  Then they had to guess what type of candy the clue referred to -  in this case, 3 Musketeers.  They had to fill it out and turn it in and at the end of the day I drew one out and that person got all the candy that were the answers.  I put the candy on a tray in the teacher's lounge so they could get help when they got stuck.


Candy bar game


All in all, it turned out really cute.  The teachers had a great time with the game and raved about the decorations.  And the jalapeno ranch flavored popcorn I got was a HUGE hit.  It was all gone before lunch!


I just hope it made them feel appreciated because they do such wonderful work!!