Monday, February 17, 2014

What New Colors Are On Their Way? Color Clue #1

New colors are coming to Wheelbarrow Cottage very soon!  I am so excited to get my hands on them!  So, in honor of the new colors, I'll be posting clues as to which ones will be showing up on the shelves on my Facebook Page, and then pictures of pieces painted with those colors here on the blog.  So be sure and check both often!  Here is Color Clue #1!

First paint color clue!! This color represents amazingly brave men and women who are heroes among us. It doesn't describe any of our Presidents (I was hoping for the President's Day tie in!) but the following famous people can claim it...Drew Carey, Don Imus, Shaggy (a rapper - I didn't know either), The Everly Brothers, and Captain Kangaroo. Who knows it??

The answer: Marine Blue!  I can't wait to paint some things with this gorgeous color.  To be honest, when I first started looking at Shabby Paints colors, I wasn't at all interested in it.  But the more pieces I saw painted in it, the more excited I got to use it!  So take a look for yourself!


Aren't they all so gorgeous?  

Okay, be on the lookout for some more clues and pictures coming up soon! 

Sunday, February 9, 2014

Licorice Love!!

I remember going to the mall when I was a little girl.  I LOVED it! There was so much to see - the displays in the store fronts and decorations for the different seasons.  But when I think back to going to the mall as a kid, I also remember the smells.  The smell of the new clothes is one that always comes to me but more than anything I remember the smell of the CANDY STORE!!

We didn't go to the mall a lot when I was younger.  It seems like it was only for special occasions - new school shoes or a dress, hat and gloves for Easter Mass.  So any time we went we always got to get something from the candy store.  My order NEVER changed.  It was always red licorice...or snakes as I called them.  They weren't like licorice today.  They were long ropes of licorice that they would cut for you when you ordered.  While they were delicious, half the allure was pretending they were snakes.  We'd get in the station wagon - not buckled of course b/c we wouldn't have EVER thought of that back then - and climb back and forth over the seats (good old days) - and play with our "snakes".

Anyway, that all came to my mind the other day when I was thinking about the two furniture pieces I've painted recently - both in Shabby Paints Licorice Chalked Paint.  While the name, Licorice, made me think of my beloved red licorice snakes, this is named after the black licorice.  It is a beautiful true black chalked paint.  I don't believe there are many true blacks in the chalked paint world. 

The first project was a vanity for a friend of mine who has the same dilemma in her house that I have in mine.  No bathroom counter space!  She found a vanity for a great price and wanted it painted black.  In her case, I actually mixed the Licorice Chalked Paint with Smoked Pearl Shimmer Paint to give it a little bit of a shimmery look. I love this Smoked Pearl Shimmer Paint.  I also used it here mixed with Garfield Grey and it was just as gorgeous! I tried to get a picture to reflect the shimmer - I never could get the right lighting to show it off but here's my attempt.  It looked really pretty.


Here's the before and after!


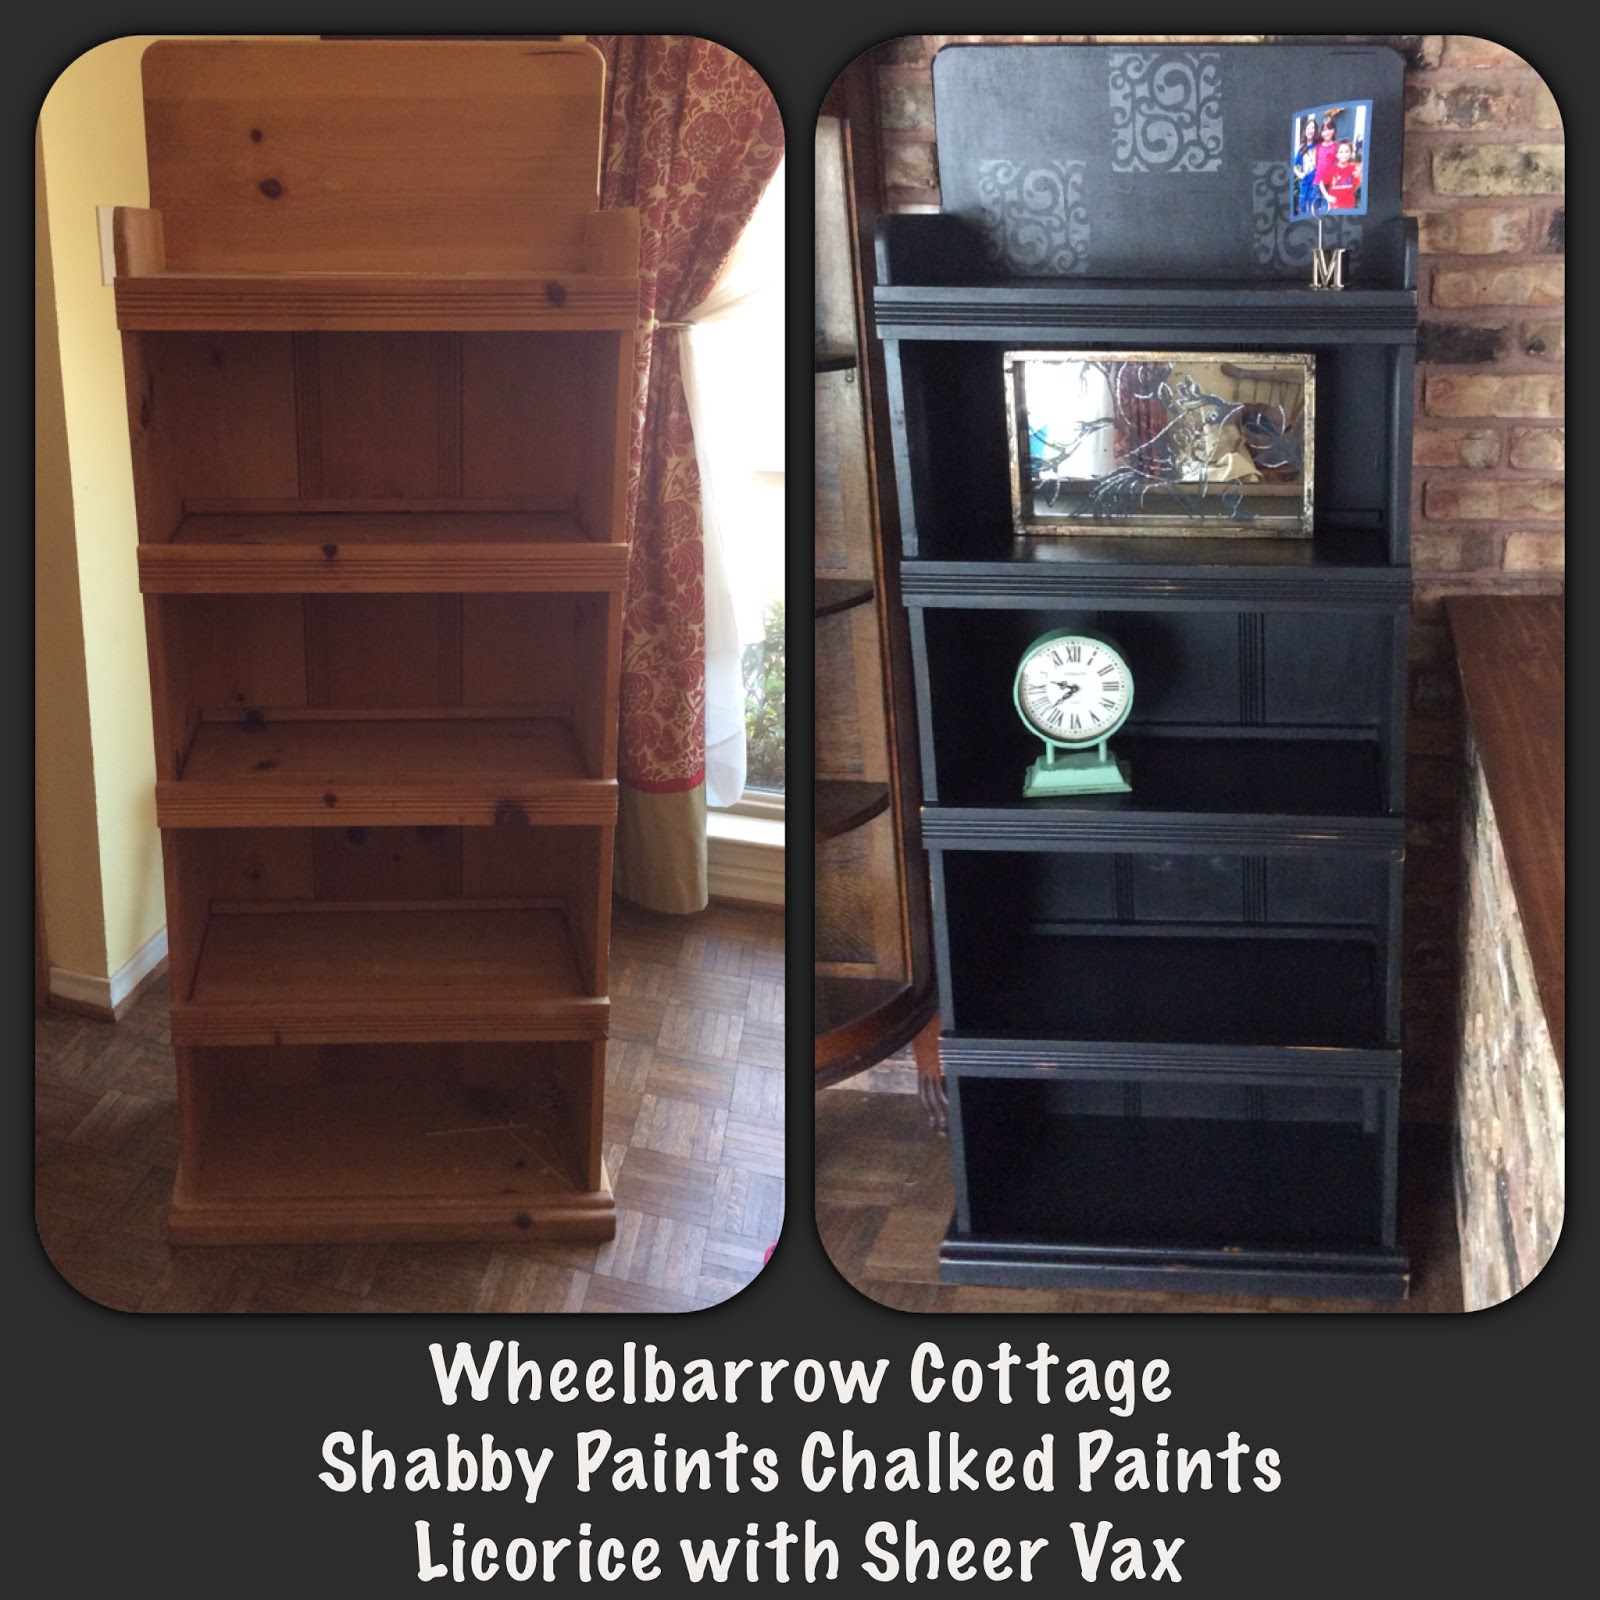
The next piece I did was for my amazing hair stylist!  She was rearranging her salon to bring in a new stylist and needed to start using a bookshelf that had held books, magazines and kids toys to hold some of her product that she sells so she wanted a new look for it! 


It looks so much better!  This one is pure Licorice with some distressing to let the original wood color through.  But, I just couldn't leave my Smoked Pearl alone!  I had been wanting to try my hand at stenciling!  Sheila didn't really mind me using her piece for an experiment so I tried it out.  I'll have a post out soon about how I saved a bunch of money by making my own stencil!  Anyway, I used the Smoked Pearl for the stenciling that you see at the top!  I finished it off with some Sheer Vax.


I loved doing both of these projects because they were for friends.  And as an added bonus, I'll get to the see the bookshelf every 4 weeks when I go to get my hair did!

I love this color - I'm sure you can find something to put it on too!!

Wednesday, January 29, 2014

Spring Home Improvement Ideas...Shabby Paints Style!!

It's so cold here right now - 25 degrees as I write this!  Dallas people are not used to this kind of cold!  I am not complaining though because in the next couple of days it will get back into the 60's.  The joke here is that if you don't like the weather, just wait a minute and it will change.

Even though it doesn't feel like it right now, spring is right around the corner.  And when I think of spring for some reason my thoughts turn to my house.  Spring cleaning, organizing, and...DECORATING!  My main project this spring...actually, I'm hoping in the next few weeks, is going to be my kitchen cabinets.

I had started painting them last summer with some chalk paint but the product was making me crazy.  It was the kind I referred to in this post where you have to wait several hours before applying the finish.  Then when I would start to put the finish on, it would distress the paint away.  Now, when I'm painting furniture that is the look I like, but not on my cabinets!  So I stopped...and yes, I've been living with two different colored cabinets.  Luckily, I have a very understanding hubby and we don't do a whole lot of entertaining so the only people who have seen it this way is extended family. But, it's starting to bother me and I'm ready to do something about it!

I've been playing around with what to do and then saw this picture posted by Shabby Paints Stylist Anita from Heart and Soul Vintage.


She re-did her bathroom cabinets with Shabby Paints Worn White and Buffalo Brown Chalked Paint as well as some touches of Old Gold Shimmer Paint.  It is exactly the look I'm going for in my kitchen!  She used sheer Vax for her finish.  I think I might go with Hazelnut ReVax since I want mine a tiny bit darker.  I can't wait to get started!

The Shabby Paints Vax / ReVax or Varnish are the perfect finishes for your home project.  Not only will they provide excellent protection, you don't have to wait hours on end in between painting and applying the finish so it won't take as long to get done!  And since all you need to do is paint them on (no rubbing and buffing), they don't need to cure and you never have to re-apply...they are perfect for this type of big project!

Here is another cabinet make-over.  These are kitchen cabinets and the color is Cranberry, a custom color that our Shabby Paints Sylist Kritsi from Pieces of Time created. 


Kristi's client even painted her breadbox!  Gorgeous!

Hmmmm...what else can you do around your house with Shabby Paints?  How about your tile floors?  NO WAY you say!  Oh yes!  Check out this before and after by another client of Kristi's (she's got some creative folks buying paint from her!!)


This is Vanilla Bear Chalked Paint with Shabby Paints Varnish for protection and shine.

What about the fireplace?  Check this post out from the Shabby Paints owner!  She repainted the bricks around her fireplace and it's gorgeous!

There is no end to things you can do around your home with Shabby Paints to spruce up for spring time...and beyond!

I hope I've gotten your creative juices flowing!  Mine are - I had to take a little break while writing this and already painted one side of a cabinet door!  And now I'm trying to figure out what color to paint my fireplace mantel!

And PLEASE, send me any pictures of home improvement projects you do!  I love to get inspiration from others!


Saturday, January 25, 2014

Why Shabby Paints? All 4 Parts In One Place!

Did you miss my Why Shabby Paints Series?  If so, I've consolidated it all here for you in one easy place!  You can read them in order...or mix it up a bit!  What the heck - go crazy and read them backwards!  (I know...I need to get out more...) 

Part One: Prices and Sizes

Part Two: Finishes

Part Three: One Word...Colors

Part Four: The People and the Odds and Ends

Also...this would've been a great addition to Part 4 but just came about.  If you have questions about using Shabby Paints...you can always ask me of course, but we also have another place to go!  A new Facebook Group that you can join and one of the Shabby Paints Stylists will answer your question!

Click here to join the Shabby Paints Questions and Answers Group!

Enjoy!

Thursday, January 23, 2014

Gorgeous Thomasville Hutch and Desk - So Serene and Worn White

I just finished this piece and put it up for sale!  Hard to part with this one!  It's so pretty and peaceful!  I feel calm when I look at it!

I used Shabby Paints So Serene and Worn White and then finished it in Black ReVax and a coat of Sheer Vax! 

I can just picture a sweet little child sitting at it to do their homework!  I hope it brings them a lot of happiness, peace and good grades!  Haha!!


Sunday, January 19, 2014

Why Shabby Paints? Part 4: The People and The Odds and Ends


We've talked about how Shabby Paints offers amazing prices and several sizes, their unbelievable easy to use protective finishes, and the beautiful colors and shimmer paints.  All of this is great, but the thing that makes this company so wonderful and different is the people.  The people behind the company - the owners and the stylists.  They all combine to make a supportive and creative environment.

The owner, Shannon, explains why she started Shabby Paints here.  She wanted a safe paint to use that wouldn't be harmful to people's health or the environment.  I also love this quote which greets you at the main page of the Shabby Paints website
Introducing the belief that success is rarely achieved alone…
and never at the expense of  humanity, health, or the environment in which we live.
That really spoke to me the first time I saw it.

The stylists are another great thing about this company.  They are dedicated to helping the customers understand how to use the paint and finishes in order to create beautiful furniture, crafts or other decorating projects.  And not only that, they are all more than willing to help each other out.  There is so much support, camaraderie, and help between stylists - not competition like you might think.  You can read more about many of them here.

I love that the paint is made in the USA!  And even the colors are patriotic!  Betsy Ross Red, Marine Blue and Purple Heart to name a few!

There are also some products I didn't get to talk about in the other posts so I'll stick them in here!

Furniture Fracture is one.  This product creates a crackled effect.  Some people do this with a glue and water  mixture.  It works great BUT...you have to cover it with paint at JUST the right time or it doesn't work.  Not with Shabby Paints Furniture Fracture.  You just paint over it once it's dry.  It's super easy to use and creates a wonderful effect.
I did this piece with the Furniture Fracture...and darn it, I didn't take any close ups!  Smart Stevie!  I'll get someone day soon so I can share them.

Another cool product that I haven't gotten to try yet is the Shabby Paints Shabby Texture.  This would be used in stenciling projects, embossing, or even repair and wood filler.  Check out more about it here. I can't wait to try this as I am just about to start getting into stenciling!  I'll share with you when I do of course!

Well, this ought to do it for the Why Shabby Paints? series.  I hope you've learned a little and become inspired to use these great products!  If you have questions that I haven't answered, please don't hesitate to ask! 

Friday, January 17, 2014

Why Shabby Paints? Part 3: One Word...COLORS!!


Did you miss me yesterday?  I know you were waiting on the edge of your seats for part 3.  Yesterday was not a terrible, horrible, no good, very bad day but it was SUPER busy.  I just never had a second to sit down until super late.

Every day I have a hard time picking what to talk about next...not because I don't know what to say, but there is so much to choose from!  But, it seems like the theme for today in several of my conversations with people about Shabby Paints has been the COLORS!

They are gorgeous! I have the hardest time choosing one I want to use every time I have a new project.  Take a look and you'll see why!


And there are plans for more colors to come out at some point.  I can't wait to see what they'll be!

At my booth right now I have the following colors: Worn White, Licorice, Buffalo Brown, Dynasty Blue, So Serene, Betsey Ross Red, and Garfield Grey.

Shabby Paints also has Shimmer paints and glazes...and they are so fun! 


Here are some things I have painted with them.

 The cutie owl was painted with Real Teal Shimmer Paint!

This table was done with a mixture of Garfield Grey Chalked Paint

Be sure and go to the Shabby Paints website to see more of the color choices for the Shimmer Paints and Glazes.

Guess what else?  Some of the Shabby Paints stylists are AH-MAZING at mixing colors and finishes and glazes to make amazing new looks.  There is a whole section on the Shabby Paints websites for Recipes.  Be sure and check that out!

Want more inspiration?  Want to see more color ideas?  Check out these Pinterest Boards!  This one is mine.  And this one is for all of the Shabby Paints Stylists to post their work.

Enjoy perusing all of the wonderful work these talented folks have done!

And check back often for new colors!!  I'll definitely keep you posted!

What is your favorite?  And if you're a "mixer", be sure to share your "recipe" with here and at Shabby Paints!